

Introduction
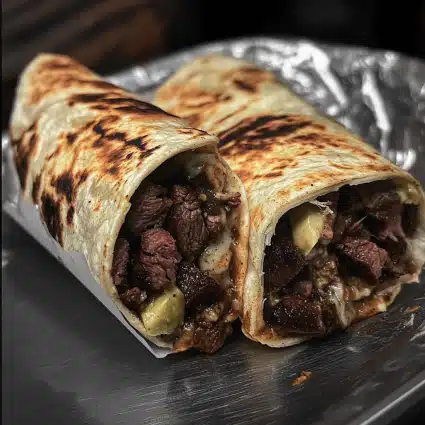
There’s just something about a warm, hearty burrito that makes any day feel like a celebration. And when you stuff that burrito with perfectly seasoned steak, creamy guacamole, and all the fixings, it transforms into a meal that’s both satisfying and downright irresistible. Trust me when I say, these Steak Burritos are going to become a family favorite faster than you can say, “Dinner’s ready!”
I first made these burritos on a whim one evening when I had some leftover steak and was craving something hearty. I grabbed a few pantry staples—tortillas, rice, and beans—and started assembling. The combination was magic. The steak was juicy and flavorful, the guacamole creamy, and the fresh veggies added the perfect crunch. I couldn’t believe how simple it was to pull together, but it felt like a special treat. Ever since then, they’ve been a go-to meal at our house, and it’s safe to say they’re a huge hit with everyone.
This recipe is perfect for a busy weeknight or a weekend gathering when you want something flavorful that doesn’t take hours to make. It’s simple to customize—whether you like your burrito spicy, extra cheesy, or loaded with veggies, you can adjust it to your taste. And don’t worry if you’re new to making burritos at home. I’ll guide you every step of the way, and you’ll be enjoying these delicious wraps in no time.
Why You’ll Love This Recipe
There are so many reasons why Steak Burritos are a must-try, and I’m here to share the top ones with you!
- Easy to Make: This recipe is surprisingly simple, with just a few ingredients and quick steps. Even if you’re new to cooking, this is something you can absolutely tackle.
- Family-Friendly: Whether you’ve got picky eaters or adventurous taste buds, these burritos will win everyone over. The steak is flavorful without being too spicy, and you can easily customize the fillings to suit any preference.
- Packed with Flavor: The steak is marinated to perfection, ensuring it’s tender, juicy, and full of savory goodness. The guacamole adds a creamy, cool contrast, while the fresh veggies give it a satisfying crunch.
- Customizable: Want it spicier? Add a few slices of jalapeños. Prefer it cheesy? Layer on some shredded cheese. You get to make this burrito exactly how you like it!
These burritos are a celebration of flavors and textures that all work together beautifully. Every bite is a perfect mix of savory steak, creamy guac, zesty salsa, and the crunch of fresh veggies—what’s not to love?
Preparation Time and Servings
- Total Time: 30-40 minutes
- Servings: This recipe serves 4 people, making it perfect for a family dinner or a small gathering.
- Nutrition Facts:
- Calories per serving: 600
- Protein: 32g
- Carbs: 60g
- Fat: 25g
Ingredients
To make these flavorful Steak Burritos, here’s what you’ll need:
For the Steak:
- 1 lb flank steak (or skirt steak for extra flavor)
- 2 tbsp olive oil
- 2 cloves garlic, minced
- 1 lime (juice and zest)
- 1 tsp ground cumin
- 1 tsp chili powder
- 1 tsp smoked paprika
- Salt and pepper to taste
For the Burrito Fillings:
- 4 large flour tortillas (bigger ones are best for stuffing)
- 1 cup cooked rice (white, brown, or cilantro-lime rice)
- 1 can black beans, drained and rinsed
- 1 cup shredded lettuce
- 1 cup diced tomatoes
- 1 cup shredded cheddar or Mexican blend cheese
- 1/2 cup sour cream or Greek yogurt
- 1/2 cup fresh salsa (store-bought or homemade)
- 1 batch of homemade guacamole (recipe below)
For the Guacamole:
- 2 ripe avocados
- 1 small red onion, finely chopped
- 1 small jalapeño, seeds removed and finely chopped (optional for heat)
- 1 tbsp fresh cilantro, chopped
- 1 tbsp lime juice
- Salt to taste
Step-by-Step Instructions
1. Marinate the Steak
Start by marinating the steak. The key to juicy, flavorful steak is giving it time to soak up all those delicious seasonings.
- In a bowl, combine the olive oil, garlic, lime juice, lime zest, cumin, chili powder, smoked paprika, salt, and pepper. Stir everything together to form a marinade.
- Place the steak in a shallow dish or a resealable bag and pour the marinade over it. Toss to coat the steak evenly, then cover and refrigerate for at least 20 minutes (or up to 2 hours for maximum flavor).
2. Make the Guacamole
While the steak is marinating, it’s time to whip up the guacamole! Trust me, homemade guacamole is a game changer, and it’s super easy to make.
- Scoop the flesh of the avocados into a bowl and mash with a fork until it’s mostly smooth with a few chunky bits.
- Add the red onion, jalapeño, cilantro, and lime juice. Stir everything together and season with salt to taste. Set aside.
3. Cook the Steak
Once the steak is marinated and ready, it’s time to cook!
- Heat a grill pan, cast-iron skillet, or outdoor grill over medium-high heat. When it’s hot, place the steak on the grill or pan.
- Cook the steak for 4-5 minutes per side for medium-rare, or longer if you prefer it well-done. (Tip: If you’re unsure about the doneness, use a meat thermometer—135°F for medium-rare, 145°F for medium.)
- Once the steak is cooked, remove it from the heat and let it rest for a few minutes before slicing. This helps the juices redistribute and keeps the meat tender.
4. Assemble the Burritos
Now comes the fun part: assembling your burritos!
- Lay out your flour tortillas on a flat surface. If you want extra soft tortillas, warm them up in a dry skillet for a few seconds on each side.
- In the center of each tortilla, place a spoonful of rice, followed by a layer of black beans, a handful of shredded lettuce, and a few spoonfuls of salsa.
- Slice the steak against the grain into thin strips and add a generous portion to each burrito. Then top with a few spoonfuls of guacamole and a sprinkle of cheese.
- Finally, dollop on some sour cream and add a squeeze of lime juice for a fresh pop of flavor.
5. Roll the Burrito
This is the trickiest part, but don’t worry, I’ve got you covered!
- Fold in the sides of the tortilla, then roll it tightly from the bottom up, making sure all the fillings stay tucked inside. Don’t worry if it’s not perfect—the taste will still be amazing!
6. Serve and Enjoy
Once your burritos are rolled up, it’s time to dig in! You can slice them in half for easier eating or keep them whole for a hearty meal.
How to Serve
These Steak Burritos are already packed with everything you need for a complete meal, but if you want to take it up a notch, here are a few serving ideas:
- On the Side: Serve your burritos with a side of crispy tortilla chips and homemade salsa, or perhaps a light, refreshing salad with avocado and lime dressing.
- Pair with Mexican Rice: If you’re in the mood for something extra, try pairing your burrito with some cilantro-lime rice for a flavorful combo.
- For the Kids: If you’re serving this to younger kiddos, try swapping the steak for ground beef or chicken and add a side of soft dinner rolls for a kid-friendly version.
Additional Tips
To ensure your Steak Burritos turn out perfectly, here are a few helpful tips:
- Let the Steak Rest: After cooking, always let your steak rest for a few minutes. This helps the juices stay in the meat, making it extra tender and juicy.
- Warm the Tortillas: Warm tortillas are much easier to fold and roll, so take a minute to heat them in a dry skillet for a few seconds on each side.
- Don’t Overstuff: While it’s tempting to pile on the ingredients, avoid overstuffing your burrito. This can make it harder to roll and might cause it to fall apart.
- Customize the Spice Level: If you like things spicy, add sliced jalapeños or a drizzle of hot sauce to your burrito.
- Make Ahead: You can marinate the steak a day ahead, saving time when it’s time to cook.
Recipe Variations
While this Steak Burrito recipe is already pretty perfect, there are plenty of ways to customize it to suit your tastes:
- Vegetarian Option: Skip the steak and load up your burrito with grilled veggies like bell peppers, zucchini, and mushrooms. You can also add some roasted sweet potatoes for a hearty filling.
- Gluten-Free: Simply swap out the flour tortillas for gluten-free tortillas, and you’ve got yourself a gluten-free meal.
- Spicy Kick: Add a chopped jalapeño to the guacamole or drizzle some spicy salsa over the top of the burrito to take it up a notch.
- Cheese Lover’s Dream: If you’re a cheese fan, throw in some extra shredded cheese in the middle, and maybe even melt some on top by broiling the burrito for a couple of minutes.
Freezing and Storage
Got leftovers? No problem! These burritos store and freeze beautifully.
Storage:
- To store, wrap each burrito tightly in foil or plastic wrap and keep them in an airtight container in the fridge for up to 3 days.
- To reheat, unwrap and microwave the burrito for 2-3 minutes or heat it up in a skillet for a crispier texture.
Freezing:
- To freeze, roll the burritos tightly and wrap them in foil or parchment paper. Place them in a freezer-safe bag and store for up to 3 months.
- When you’re ready to eat, bake the frozen burritos at 350°F for about 25 minutes, or until heated through.
FAQ Section
Can I use a different cut of steak? Yes! Flank steak is perfect because it’s tender and flavorful, but you can also use skirt steak, sirloin, or ribeye. Just adjust the cooking time based on the thickness of the steak.
Can I make these burritos ahead of time? Absolutely! You can prep everything ahead of time, including marinating the steak and making the guacamole. When you’re ready to assemble, just warm the tortillas and cook the steak.
How do I keep the burrito from falling apart? Make sure not to overstuff the burrito, and wrap it tightly. If you want to make them easier to eat, you can wrap the bottom in foil to help hold everything together.
Conclusion
I hope this recipe for Steak Burritos becomes a new favorite in your home as it has in ours! Whether you’re making it for a busy weeknight dinner or a weekend get-together, it’s sure to be a hit. The juicy steak, creamy guacamole, and all the fresh ingredients come together for a meal that’s flavorful, filling, and oh-so-satisfying.
I’d love to see how your Steak Burritos turn out! Don’t forget to snap a photo and tag me on Instagram—I love seeing your delicious creations. And if you have any variations or tips of your own, feel free to share in the comments. Enjoy!